A developer has to work with APIs a lot. Fetching data and displaying it is essentially our bread-and-butter. In order to learn this crucial skill, we will create a small app using create-react-app and Random User API
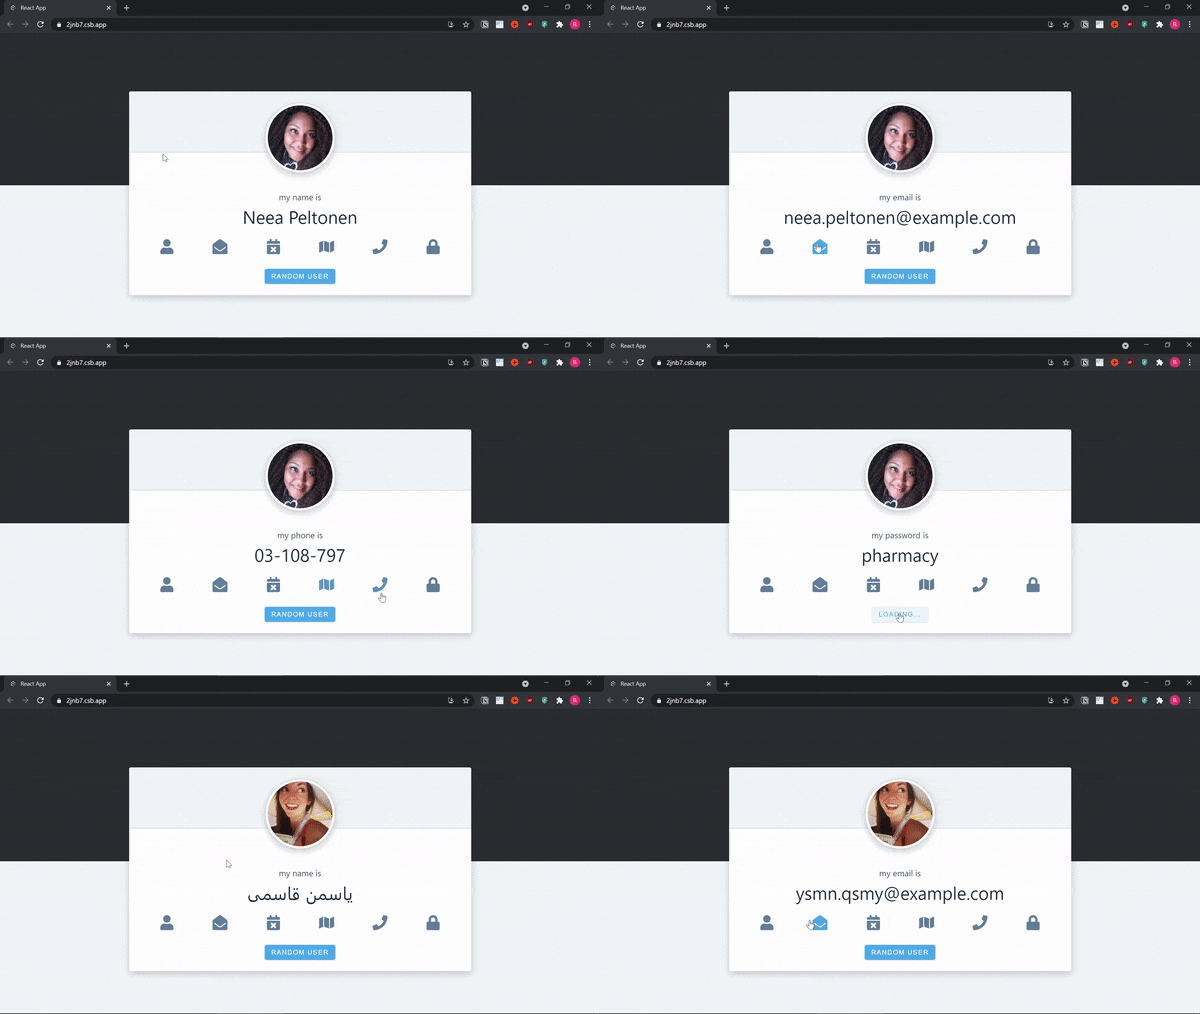
The final project will look like this:

Code: codesandbox.io/s/random-user-2jnb7
API
Let's first have a look at the API. Go to https://randomuser.me/api/
By the way, I recommend using JSONView for better formatting.
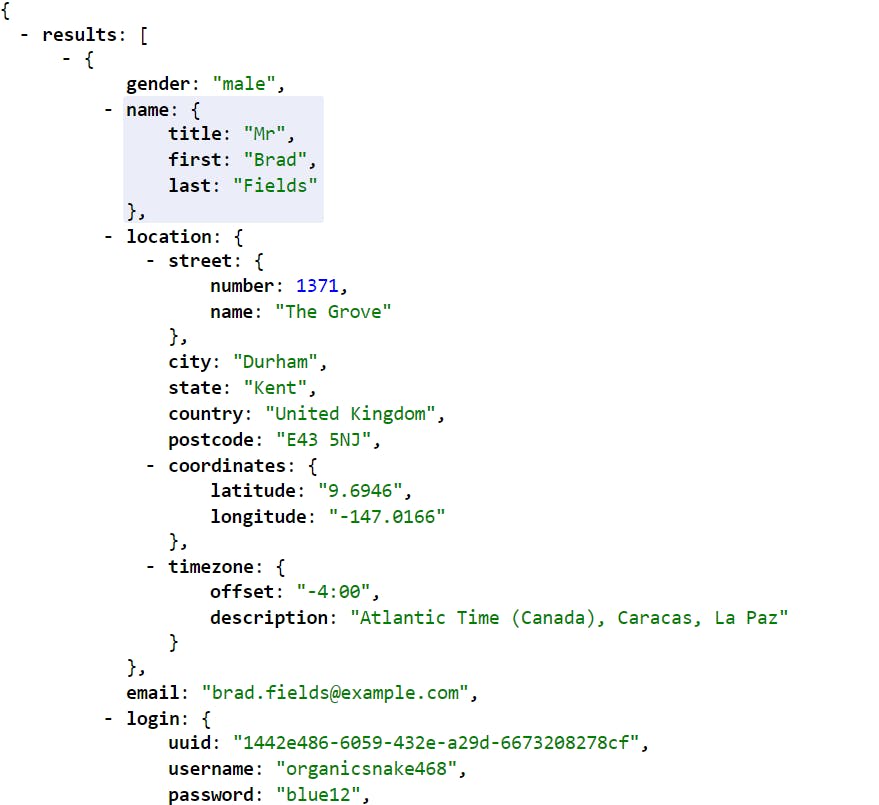
If you are using JSONView - the JSON will look something like this:

There are a lot of properties. We will be using some of them in our project.
Note: every time we refresh - we get a random user. We will be using this functionality as well in our project.
Setup
I assume you have installed create-react-app. Now, in your App.js get rid of everything. Let's set up some imports. We will be using react-icons for this project.
Install using:
npm -i react-icons
After installation, add this:
import React, { useState, useEffect } from 'react'
import {
  FaEnvelopeOpen,
  FaUser,
  FaCalendarTimes,
  FaMap,
  FaPhone,
  FaLock,
} from 'react-icons/fa'
We will be using the hooks and icons in the project.
Variables
Save the URL we navigated to before in a variable. The default image will be used before we set the random user.
  const url = 'https://randomuser.me/api/'
  const defaultImage = 'https://randomuser.me/api/portraits/men/23.jpg'
Now, let's set up some state variables inside the App component.
  const [isLoading, setIsLoading] = useState(true)
  const [randomPerson, setRandomPerson] = useState(null)
  const [title, setTitle] = useState('name')
  const [value, setValue] = useState('random person')
isLoading for showing loading when we are fetching the data, randomPerson to store the data, title for displaying the property, and finally value for the value
Fetch
Now, let's create a fetchRandomFunction to get the data from API. This will be an async function. We will use the inbuilt fetch method to get the data using async/await syntax.
 const fetchRandomPerson = async () => {
    setIsLoading(true)
    const response = await fetch(url)
    const data = await response.json()
}
We pass in the URL in the fetch method, the response is stored in the response variable which is then finally resolved into an object (data here) using .json()
Destructure
If you do a console.log(data), you will see data similar to the one we saw when we analyzed the API above. Inside the function, let's destructure some of the properties relevant to us. And finally set it to our state variable randomPerson
    const {
      phone,
      email,
      login: { password },
      name: { first, last },
      dob: { age },
      picture: { large: image },
      location: {
        street: { number, name },
      },
    } = person

    const newPerson = {
      image,
      phone,
      email,
      password,
      age,
      street: `${number} ${name}`,
      name: `${first} ${last}`,
    }

    setRandomPerson(newPerson)
    setIsLoading(false)
    setTitle('name')
    setValue(newPerson.name)
Note:
Some of the properties are nested, so we have to destructure accordingly, for example, the
passwordis inside thelogin. Learn more about destructuring here: developer.mozilla.org/en-US/docs/Web/JavaSc..In the
newPersonobject, with ES6, if the property name is the same as value, we can get away with writing only once, ie, image: image can be written as an imageWe have set
isLoadingtofalseat the end when data has been fetched successfully.
useEffect
Now, that we have our function. Let's set up our useEffect hook.
  useEffect(() => {
    fetchRandomPerson()
  }, [])
Note: The empty dependency means that it will run only once.
JSX
In this tutorial, we won't be covering CSS. Please grab the index.css file from the code link and paste it as it is if you want the same styles.
The HTML structure will be roughly like this - we will have a container in which the title and value will be displayed on the upper side and buttons below. Buttons will be used to change the title and value.
    return (
    <main>
      <div className='block bcg-black'></div>
      <div className='block'>
        <div className='container'>
          <img
            src={(randomPerson && randomPerson.image) || defaultImage}
            alt='random user'
            className='user-img'
          />
          <p className='user-title'>my {title} is</p>
          <p className='user-value'>{value}</p>
          <div className='values-list'>
            <button className='icon' data-id='name'>
              <FaUser />
            </button>
            <button className='icon' data-id='email'>
              <FaEnvelopeOpen />
            </button>
            <button className='icon' data-id='age'>
              <FaCalendarTimes />
            </button>
            <button className='icon' data-id='street'>
              <FaMap />
            </button>
            <button className='icon' data-id='phone'>
              <FaPhone />
            </button>
            <button className='icon' data-id='password'>
              <FaLock />
            </button>
          </div>
        </div>
      </div>
    </main>
  )
We are almost done. Now let's set up an event listener so that as soon as the mouse hovers over a button - the title and the value change.
For this, we will use the title and value state variables we set up before. We also need to create a new function handleValue. Notice, in the JSX, we have set up data-id, we will use this to get the value dynamically. Note, you can name it whatever you like, it just needs to start with data-
To every button add:
onMouseOver={handleValue}
The button will look like this:
 <button className='icon' data-id='name' onMouseOver={handleValue}>
     <FaUser />
 </button>
The function:
  const handleValue = (e) => {
    if (e.target.classList.contains('icon')) {
      const newValue = e.target.dataset.id
      setTitle(newValue)
      setValue(randomPerson[newValue])
    }
  }
When the event target has a class named .icon, the function takes up the value stored in its dataset object (which we set with data-id) and sets it equal to the title. After that we are using it as a dynamic object key to get the value from randomPerson object.
If you are not sure about dynamic object keys, I recommend watching this tutorial: youtu.be/_qxCYtWm0tw
Let's also add a button to fetch a new random user.
 <button className='btn' type='button' onClick={fetchRandomPerson}>
 {isLoading ? 'loading...' : 'random user'}
 </button>
And our application is complete. We have successfully fetched and displayed data from an API.

